After looking back on what has been done last week, there's not so much new stuff to show you except four new legs on my puppet's armature. But if remember how this week started, i hadn't any clue at that moment on the way i was going to build them. In fact, i was confident that twisted wires legs would do the job, but when i tried that, i figured out very fast that the weight of the legs will be an issue. So, the first half of the week was spent thinking about a new way to build them.


Even if the twisted wires would have worked, i was worried that the legs movements would be a little too jerky. When i'm in a position to find a way to have more control in my puppet's movements, i always jump on it. In the sequences this puppet will be shown, the legs are always moving back and forth and they rotate a little on there axis. So, inspired by the balls and sockets building technique, i did the legs with wooden paint stirrers. Each joints are fasten with a bolt and a nut. This way, the legs will only move in the same arc while animating them.


The legs are sticked to a broom stick piece that stays in place in a hole done in the puppet's torso. In this position, i can rotate them when needed.


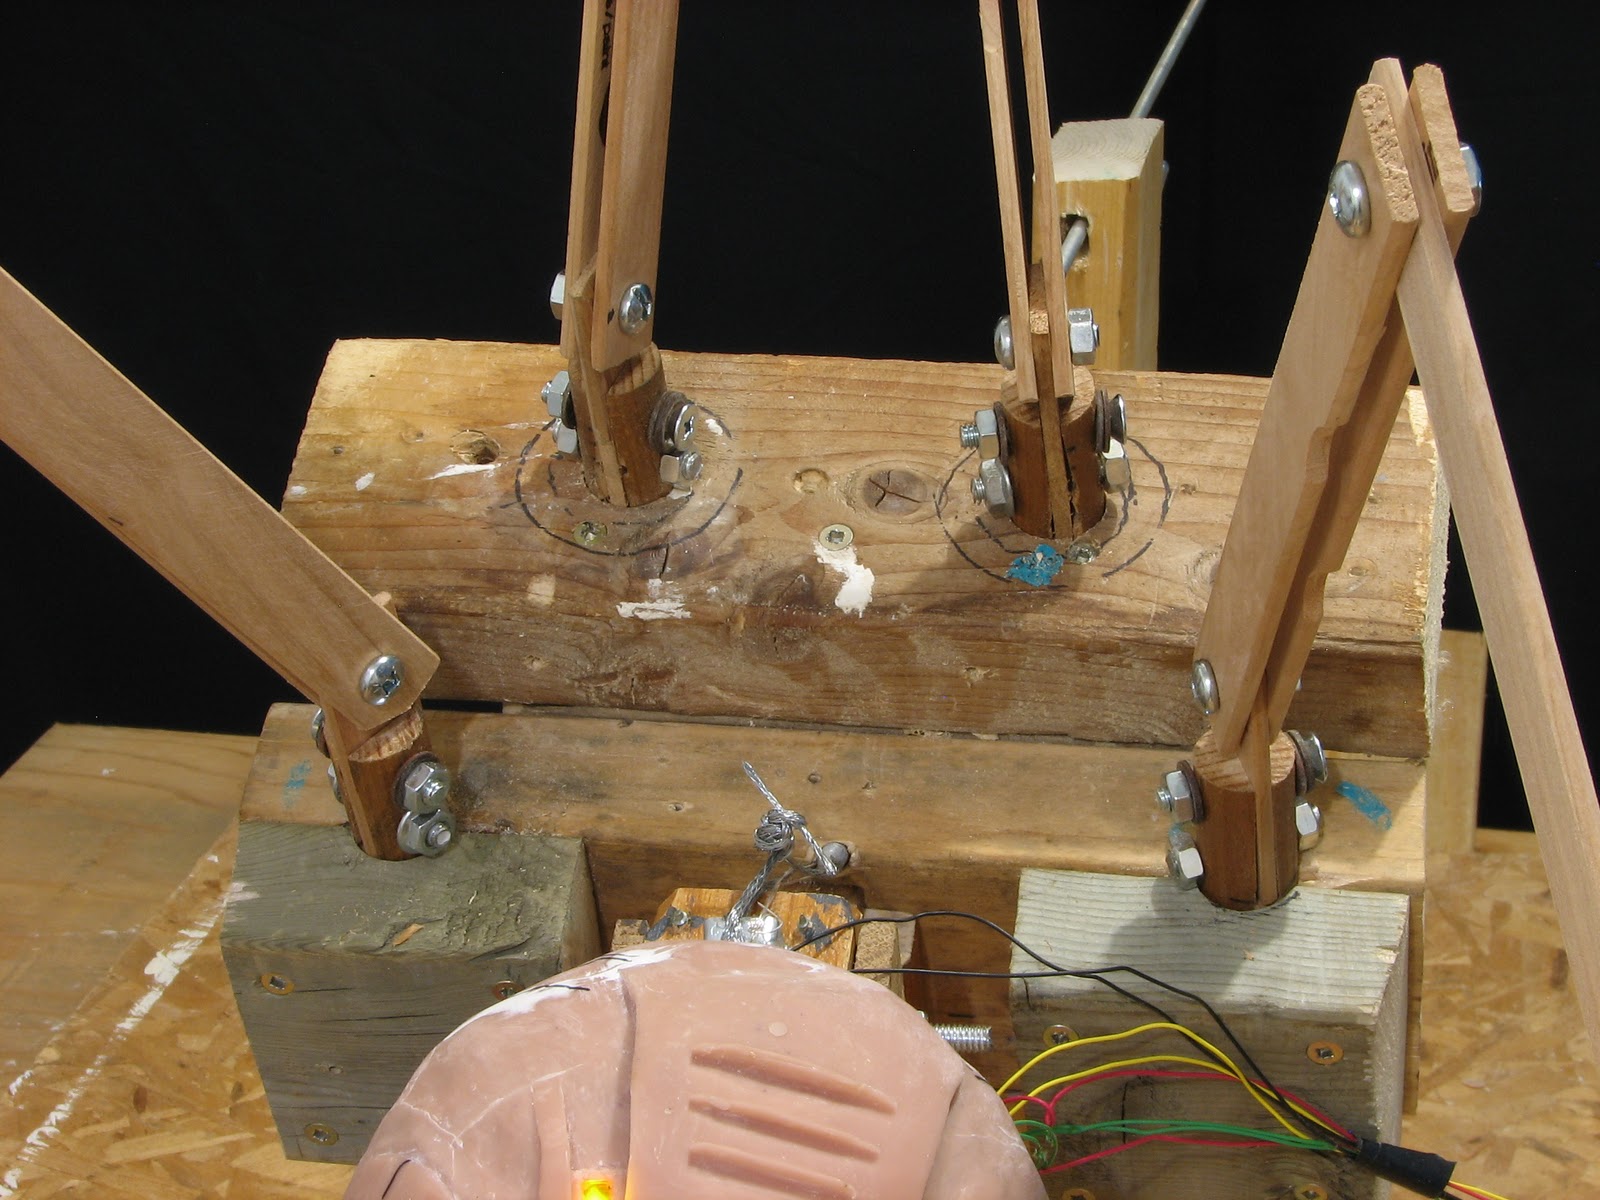
I need to harden the legs a little to be sure they won't twist or break. The four others legs are not supposed to be really moving so i'll build them with twisted wires. The armature should be finished by the end of next week and i hope the begin the padding very soon. My latex jar can't wait to be opened !


HOLY SHIT! That looks incredible! Seriously, take a step bake and look at what you've accomplished! Impressive work, dude!
ReplyDeleteThat is excellent work! I can't wait to see the build up you've got in mind for it!
ReplyDeleteWow!!! This is coming out really cool, nice job Vincent.
ReplyDeleteJeff
...donk.... hang on, let me pick that up - bloody jaw! I remember saying creating the corpser in scale to the figure would be epic. I am now seeing epic!!!
ReplyDeleteThat is so awesomely creepy...
ReplyDeleteSuch clever engineering. Are you post-op by the way?
ReplyDeleteThanks all !
ReplyDeleteJon: I can't believe i did that so nicely so far. I'm a little unconfortable when saying this is my first puppet and that it's my first time sculpting. Things aren't finished yet and everything can change. I must not be over over-confident. But, yeah.. i'm very happy.
BlacknickSculpture: I can't tell. My plans are a little blurred by now and everything can change from a day to another. I'm going a little blindly with that, but i'm pretty sure there will be holster stuff, liquid latex, plaster and paint.
Dean: I often remembered you saying that. You might inconsciently influenced me to go that way. :)
Shelley: My engineering is so... ok ok, i'll take the compliment ;) I can't answer your question. i don't understand what you mean by "post-op". I'm writting this blog down and i'm working on this project too. Hopes it answering your question.
I absolutely love that design! It looks amazing.
ReplyDeleteYou should visit my blog and take a look at some of my sketches.
www.artbyarion.blogspot.com
Wow Vincent! I can't belive what I see! This amazing!
ReplyDeleteCan't wait for the next post.
ReplyDeleteArion : You have interesting stuff on your blog, but i hadn't much time in the last days to fully appreciate it. I'll take the time this week-end. I was questionning myself about posting updates last sunday (as i do since the beginning of the construction of my Corpser), but at that time, i had really not much to say about my progress. It's not the case anymore so, i'll post progress pictures and infos next sunday for sure.
ReplyDeleteAlex: Thanks man !