A short, but though, new sequence is done. This is the one that we see, from a kind of point of view, the character turning upright the statue's head.
The challenge here was to move the statue's head and the character's arm in a smooth way. That was a shooting filled with heavy pressure. When you work with a soil ground, you can't never touch it or this will be seen. There must be a way to use spay glue to fix that, but i didn't try it. I used hairpins to move the arm to prevent touching the soil. The other problem is that there wasn't much room around to move the arm in a proper way. So i decided to shoot this sequence in reverse. I've find it easier to push the arm by moving the statue's head on it.
I had to fixed down the character's upper body in order to move only his arm. So, i built a very basic character's support for it with a screw and 2 bolts. The support was screwed on a room desk.


The head was also fixed on the room desk. Two tin metal rods were glued in holes i did in the head with a drill. The other ends of the rods were also glued in holes drilled in the room desk.

That way, i was able to move the head from left to right.

For the set, i put some soil under and around the head. The same mirror as seen in the previous sequence "Puddle" was put next to it. In order to see the sky's reflection in it, i put a clouds board over it (see "The city" post to learn how i built it).


For the camera's support, a 2''x4'' wood stud was put upright. The camera is fixed to it as seen on the previous post "The Puddle sequence".


The earthquake at the end of the sequence was done by moving the last frames from left to right at high speed in post production.
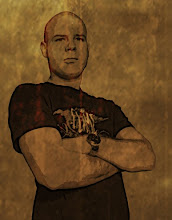
Here's an animation frame.

