Sunday, March 27, 2011

Legs armature - Part 2

I had some doubts about a few things for the last two weeks but, i managed to clear them and to move forward with the construction of my puppet.


I added more wooden paint stirrer to the legs for more strenght.  The gaps, within them, were also filled with wood pieces.


The four legs missing were done with twisted galvanised wires.  I tried to do them with aluminium wires (which are harder to break), but they weren't stiff enough to support themself.  These legs aren't suppose to move very much, so i've took this decision (i can hear people saying: Steel ! What are thinking ??).  =)


These legs were hardened with epoxy putty.  Thinking about that afterward, i should have used copper tubing and fix it in place with epoxy.  It would have been less expensive, but it was too late when i thought about that.


My head was full of doubts about what to use to fix the legs on the set.  The typical tied-downs with threaded rod and butterfly nuts was in my mind, but i was considering other ways to do it. 


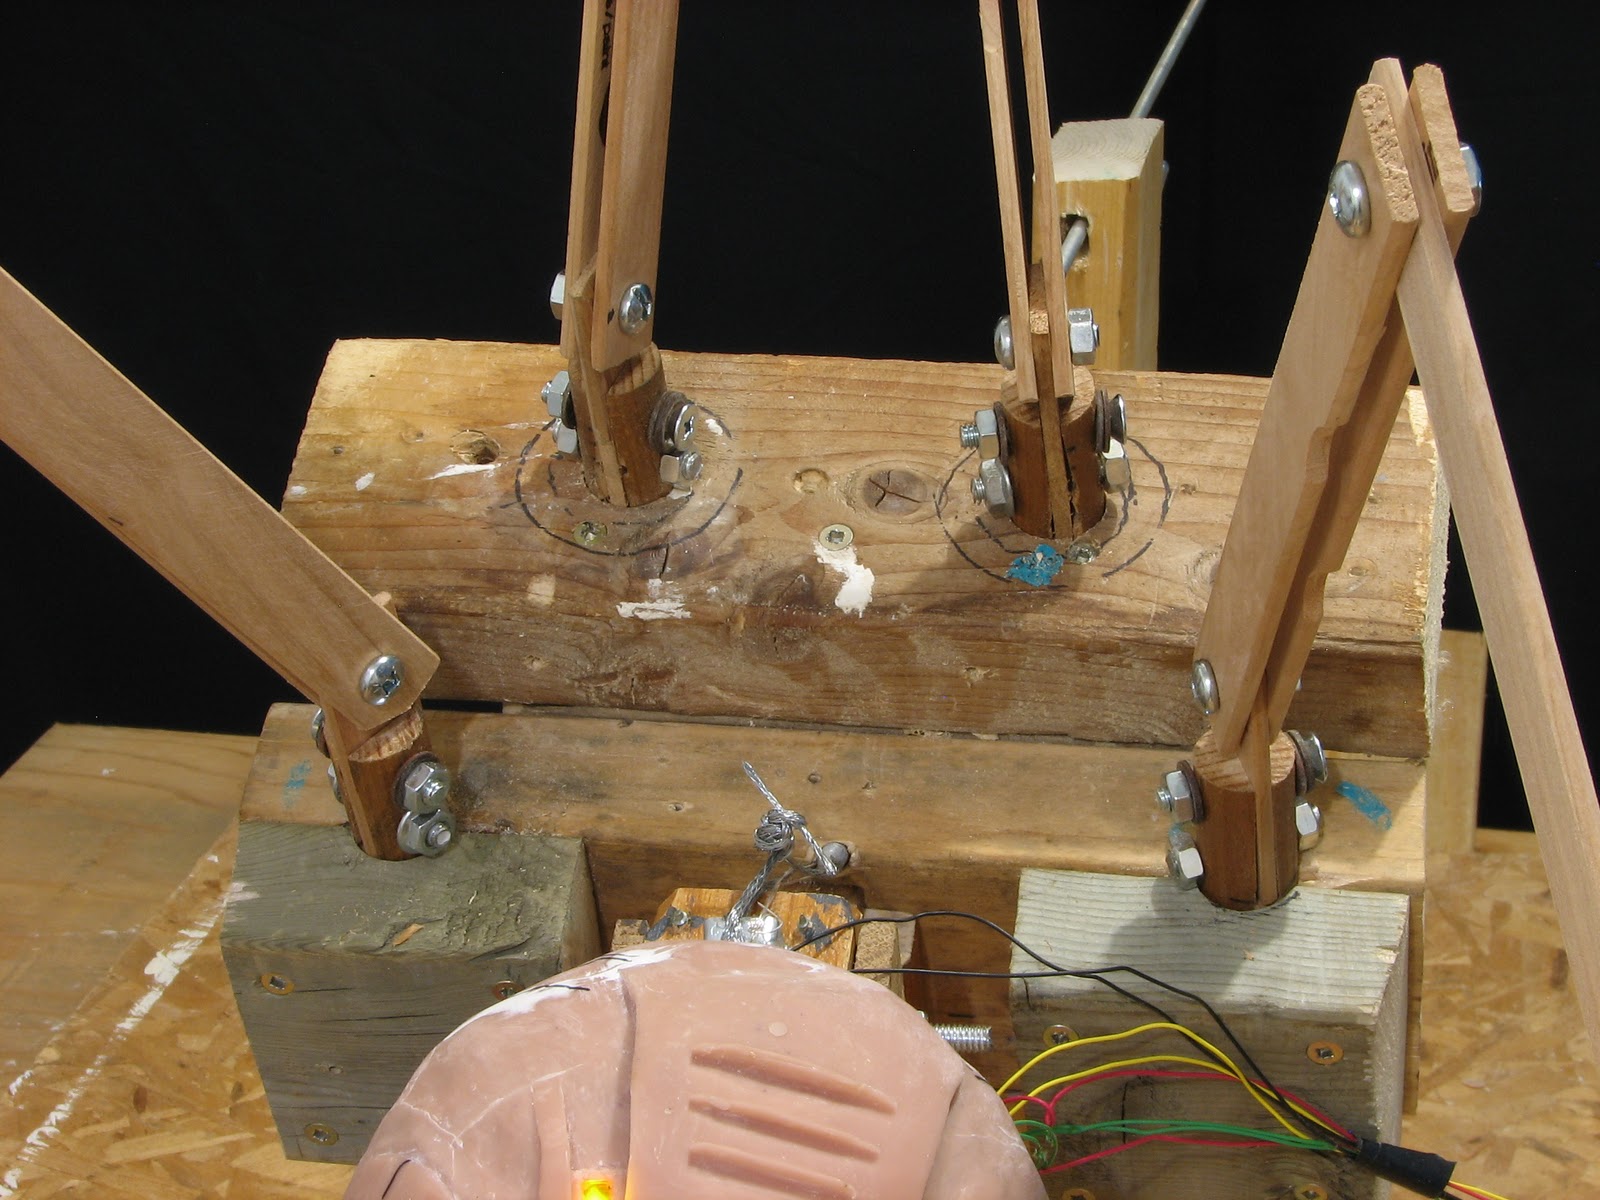
After days of headaches thinking about that, i finally choose to work with the traditionnal tied-downs.  So i've done "super nuts".  I put three of them on a threaded rod and glue them with epoxy putty.


I've used the same putty to fix them to the legs.


The Corpser's armature is finally completed !


I've started to sculpt a claw that i would like to replicate using a plaster mould.  To build the claw, i've bought a conical shaped styrofoam piece and i slided a twisted metal wire in it (to simulate the armature position).  I use a knife to adjust the shape and finished it with some pre-mixed plaster.  I need to work on it a little bit more but, here's what it looks like after some sanding.


I built this box for the moulding.  Each legs should be placed in it and come out with a nice plaster claw on it.


I'm very excited about doing my first mould, but i'm also very scared...

Sunday, March 13, 2011

Legs armature - Part 1

After looking back on what has been done last week, there's not so much new stuff to show you except four new legs on my puppet's armature.  But if remember how this week started, i hadn't any clue at that moment on the way i was going to build them.  In fact, i was confident that twisted wires legs would do the job, but when i tried that, i figured out very fast that the weight of the legs will be an issue.  So, the first half of the week was spent thinking about a new way to build them.  


Even if the twisted wires would have worked, i was worried that the legs movements would be a little too jerky.  When i'm in a position to find a way to have more control in my puppet's movements, i always jump on it.  In the sequences this puppet will be shown, the legs are always moving back and forth and they rotate a little on there axis.  So, inspired by the balls and sockets building technique, i did the legs with wooden paint stirrers.  Each joints are fasten with a bolt and a nut.  This way, the legs will only move in the same arc while animating them.  


The legs are sticked to a broom stick piece that stays in place in a hole done in the puppet's torso.  In this position, i can rotate them when needed.        


I need to harden the legs a little to be sure they won't twist or break.  The four others legs are not supposed to be really moving so i'll build them with twisted wires.  The armature should be finished by the end of next week and i hope the begin the padding very soon.  My latex jar can't wait to be opened !

Sunday, March 6, 2011

Corpser's neck mechanism

I managed to build the neck mechanism of my puppet this week.  I wasn't sure about the best way to do it.  One thing i was sure of, the weight of the head was a problem.

My first idea was to use a desk lamp's flexible support as a neck to link the head to the body.  I didn't try that, because i was afraid to have a jerky animation result (my character's animation experience is very little).  


So i choose to work with a hinge that would move the head, only up and down, but with a good control on it.


After this mechanism was done, i looked at the original movie in loops and i quickly find out that i didn't want my puppet's head to only move in one axis.  So i build a 3 axis mechanism, which i'm pretty happy working with.


Here's the part for moving the head clockwise and counter-clockwise.


Photobucket


Here's the part for moving the head left and right.


Photobucket


Finally, the part to move it up and down.  There's a wire that maintain the head in the desired position.  It's attached on a thread rod and stays in place with a nut.


Photobucket


Here's a quick animation test i have done to get the feel of it and to see if any more adjustments were required.


Some pictures i made for fun.


I'll work on padding up the body this week.


Uh oh !!  I almost forgot.  Brett McCoy sent me a rough mix this week of the soundtrack he's preparing for my movie (Yeah yeah... Brett McCoy !!).  I don't want to tease you, but this sounds awesome !!  He is very well known in the stopmotion community as a brilliant composer.  He kindly do music for stopmotion artists while working on his personal projects.  If you haven't did it already, visit his website -> www.electricminstrel.com