Thursday, December 23, 2010

Corpser first sketch on paper (Scale 1:24)

I just tried a first sketch on paper with the monster i have to build up for my last sequences.  It's called a "Corpser" in the Gears of War's world.  It looks like a giant spider.  I was lucky enough to find someone (<  Profess >) on the Epicgames forum to send me some pictures of it from the game, with a human standing on his side. 


The point was to be able to build it with the proper scale, comparing it to my character that is 3 inches tall.  After some arithmetics, the results was that it needs to be 21 inches tall by 15 inches wide (without it's legs).  Kindda big...  I need to say that from begining of my project, the idea was to put everything on the same scale (1:24).

I didn't draw the eight legs on this paper sketch.  They fit in the six holes that you can see and two more comes from the sides.  In this position, the creature is leaning a bit forward.  The head isn't big enough by the way, and the point here was not to do a great drawing, but to get familiar with the proportions of each body parts.  I'm kindda shy to show this after digging all the afternoon Jeff Lafferty's blog :)    


I wasn't really sure that it's was a good idea to build it with Super Sculpty anymore...  Super Sculpty allows the creation of tiny details, but with a beast of this size, it would have had to heavy legs to animate them properly.  It would have also required too much material and would have end up too expensive.  My wife was joking when i told her about my problem, when she told me that i could use "papier mache" to built it...  It's not a very bad idea, but i don't think it would have fit very well with the all the other kind of materials i've use so far.  I also need to say that i only need this puppet in two sequences that are two and four seconds long, so i don't want it to be too expensive and too complicated to build.

I'm now more into the idea to sculpt it smaller, maybe at 6-8 inches high, with Super Sculpty and use clay for the joints.  For the armature, i'll use twisted wires.  Even if i'm not very comfortable with the idea, i'll shoot the sequence that includes both the beast and the character on two differents layers and combine them in post-production.  I'll probably use a green screen for that.

The final sculpt should look like that.


Putting LED lights inside the skull would be very nice, but i think that's a big challenge enough even if there isn't, so i'll probably pass on that.

Tuesday, December 21, 2010

Back to stopmotion with sequence #5 "Earthquake"

Wow !  I never thought it will felt so good to return to my project.  I feel ready to complete this !

The last sequence was done very fast and wasn't very hard at all.  The camera movement setup was already in place, the measurement marks was the only thing missing.  The city setup was done the same day.  The animation was done the next day.  I took another day to clean up the pictures, to edit the video and to add the explosion effects.

Here's it is.


I'm not that good with special effects and i wasn't really in the mood to do them in stopmotion but, i couldn't do this sequence without that effect.   So i edit a free explosion effect founded at Stopmotionmagazine.com.  You can't really call that "explosions", but i don't really know how to call them.  It like dust that comes from the ground after collapsing.

Here's the link for the free explosion effects:
http://www.stopmotionmagazine.com/StopMotionMagazine/FreeStuff.html


Here's the character's support


Camera's support pictures


Here's some setup's pictures


The next step is big, but it will be very interesting.
Sculpting the "Corpser" !

Sunday, December 12, 2010

A new hope

I begin to feel my motivation getting back again.  Many inches of snow had fall around here and there is one week left of day work before my Christmas vacations.  Thats very good for my moral.  

I'm currently working on our bathroom (home) renovations by now.  Which includes: plastering, painting, cutting wood pieces, using my drill and putting props in place.  That's pretty near what i was doing on my project, but at a different scale :)

There's also a friend of mine who had done a music live performance on stage last November.  I shooted it with my DV camera and i am currently working on it to put it on DVD.

My routine was very messed up in the last weeks by these new projects and i have to rebuild one which will include my stopmotion works. I hope to be able to finish the shot i've begin before Christmas, to stick with my deadlines.

Thanks again for your support.

Thursday, December 2, 2010

Lacking motivation, enthusiasm, energy...

I feel bad about me (my project) and about all of you who support me with my project...

After i finished my last sequence, i started the setup for the next one but, i didn't really touched it in the last month.  Every year, i go through this mood in this period.  I have a big lack of motivation, enthusiasm and energy.  I think this have something to do with the lack of light with the winter coming.  I think it's called "Seasonal affective disorder".  It's generally coming back with the fall of snow (it's only raining by now).

Since the beginning of this project, i commit myself to do at least one hour of work on my project each day and that wasn't really difficult.  It took me around one month to complete each sequence so far.  One week to build a new setup, one week to shoot the animation and one week to edit the pictures.  After that, i took a week off and slowly starting to think about the next one.  I didn't have to force myself into doing my project and i have always thought, that i would never work on it under pressure.  This project is something that i do for fun and i don't feel like working on it right now.

I'm not giving up if this is what you are thinking.  I felt like you deserve to have some news about my progress.  You were here, following and supporting me since the beginningm and the least that i can do is to tell you that i'm still here and that i'll continue this project in the next weeks.

Saturday, November 6, 2010

The "Head" sequence

A short, but though, new sequence is done.  This is the one that we see, from a kind of point of view, the character turning upright the statue's head.


The challenge here was to move the statue's head and the character's arm in a smooth way.  That was a shooting filled with heavy pressure.  When you work with a soil ground, you can't never touch it or this will be seen.  There must be a way to use spay glue to fix that, but i didn't try it.  I used hairpins to move the arm to prevent touching the soil.   The other problem is that there wasn't much room around to move the arm in a proper way.  So i decided to shoot this sequence in reverse.  I've find it easier to push the arm by moving the statue's head on it.

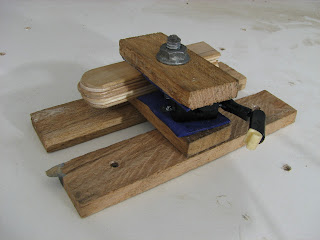
I had to fixed down the character's upper body in order to move only his arm.  So, i built a very basic character's support for it with a screw and 2 bolts.   The support was screwed on a room desk.


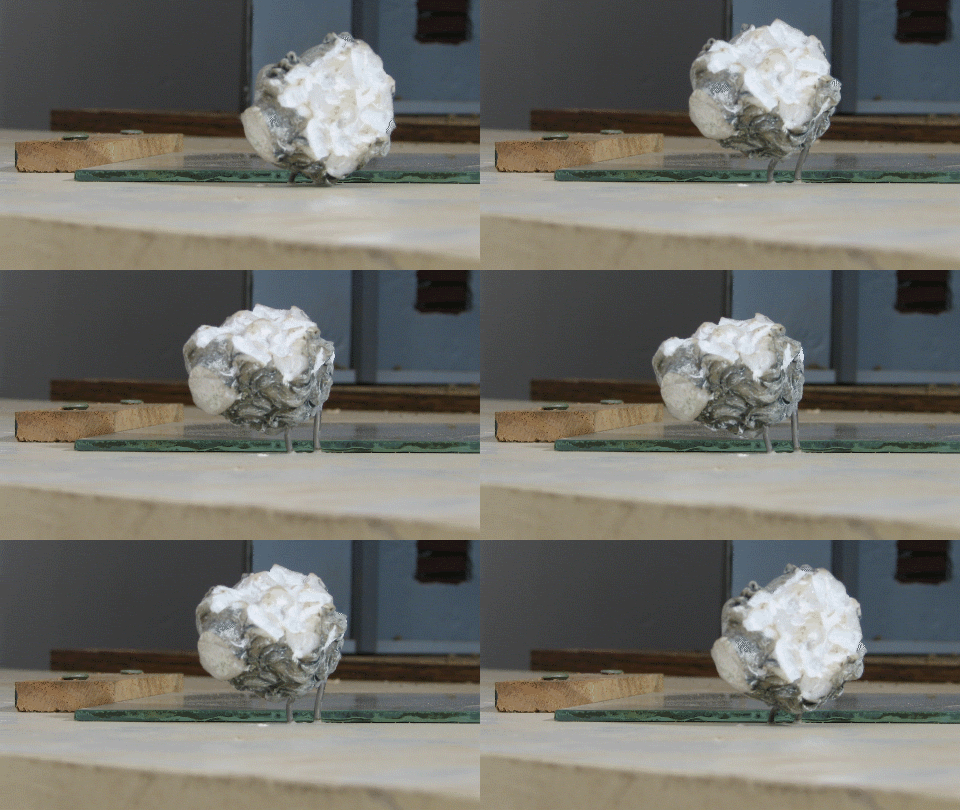
The head was also fixed on the room desk.  Two tin metal rods were glued in holes i did in the head with a drill.  The other ends of the rods were also glued in holes drilled in the room desk.  


That way, i was able to move the head from left to right.

Photobucket


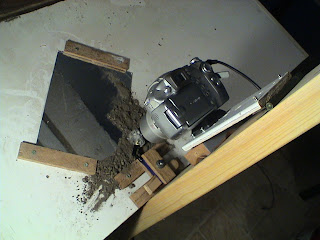
For the set, i put some soil under and around the head.  The same mirror as seen in the previous sequence "Puddle" was put next to it.  In order to see the sky's reflection in it, i put a clouds board over it (see "The city" post to learn how i built it).


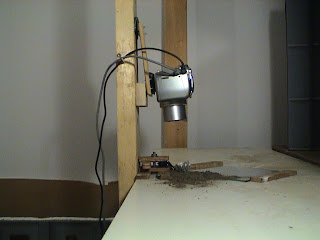
For the camera's support, a 2''x4'' wood stud was put upright.  The camera is fixed to it as seen on the previous post "The Puddle sequence".


The earthquake at the end of the sequence was done by moving the last frames from left to right at high speed in post production.

Here's an animation frame.

Tuesday, October 26, 2010

A new article about my project as been published !

Yeah !  I can't believe it.  Within the last month, my project's visibility increased a lot with the article Marc Spess wrote on "Animateclay.com" and with this new article wrote by Hasan Ismail on is blog "RASTASIA : In full motion".


I met him on Vimeo, where he created a video channel "Stikmotion" that shows Stikfas in action.  I'm very happy that someone took the time to create environnements like that for the great pleasure of all the Stikfas fans.

On his blog, he says that his mission is to share with you his passion on audio, video and the one toy that fascinates him so much that he undertaken personally to show them around the Netherlands !  He wish to present Stikfas as a communication platform and bring it to another level using tools available in Web 2.0.  He is also an audio engineer by profession with a fully equipped post production studio for post productions works. 

You can visit is Vimeo channel here and also read news about Stikfas here on his blog.

Monday, October 25, 2010

The "Puddle" sequence

Hey there !
The "Puddle" sequence is done ! 

I wasn't expecting this one to be done so fast.  I did the setup last week very slowly.  I wasn't really in the mood since the rush i imposed to myself for the last two sequences.  Friday night came and i thought that some more lightning test would be great to be prepared for the shooting on saturday.  The camera rig wasn't gone throught tests neither.  I was surprised to have good results so fast and before i knew it, half of the sequence was done.  The other half was very thought but since i got that far, there was no way to quit that and lose my momentum.

Here's the results


Here's the setup


The only light bulb that was used was the one showed below (I set my camera's exposure at 3.2 seconds).  This is a general household spiral bulb.  The only ones used in this project with the leds used as streets lights.

The spiral bulb Enersaver specs

- 40 watt
- 4100K
- 500 lumens
- Medium base
- T2 smaller size
- Cool white

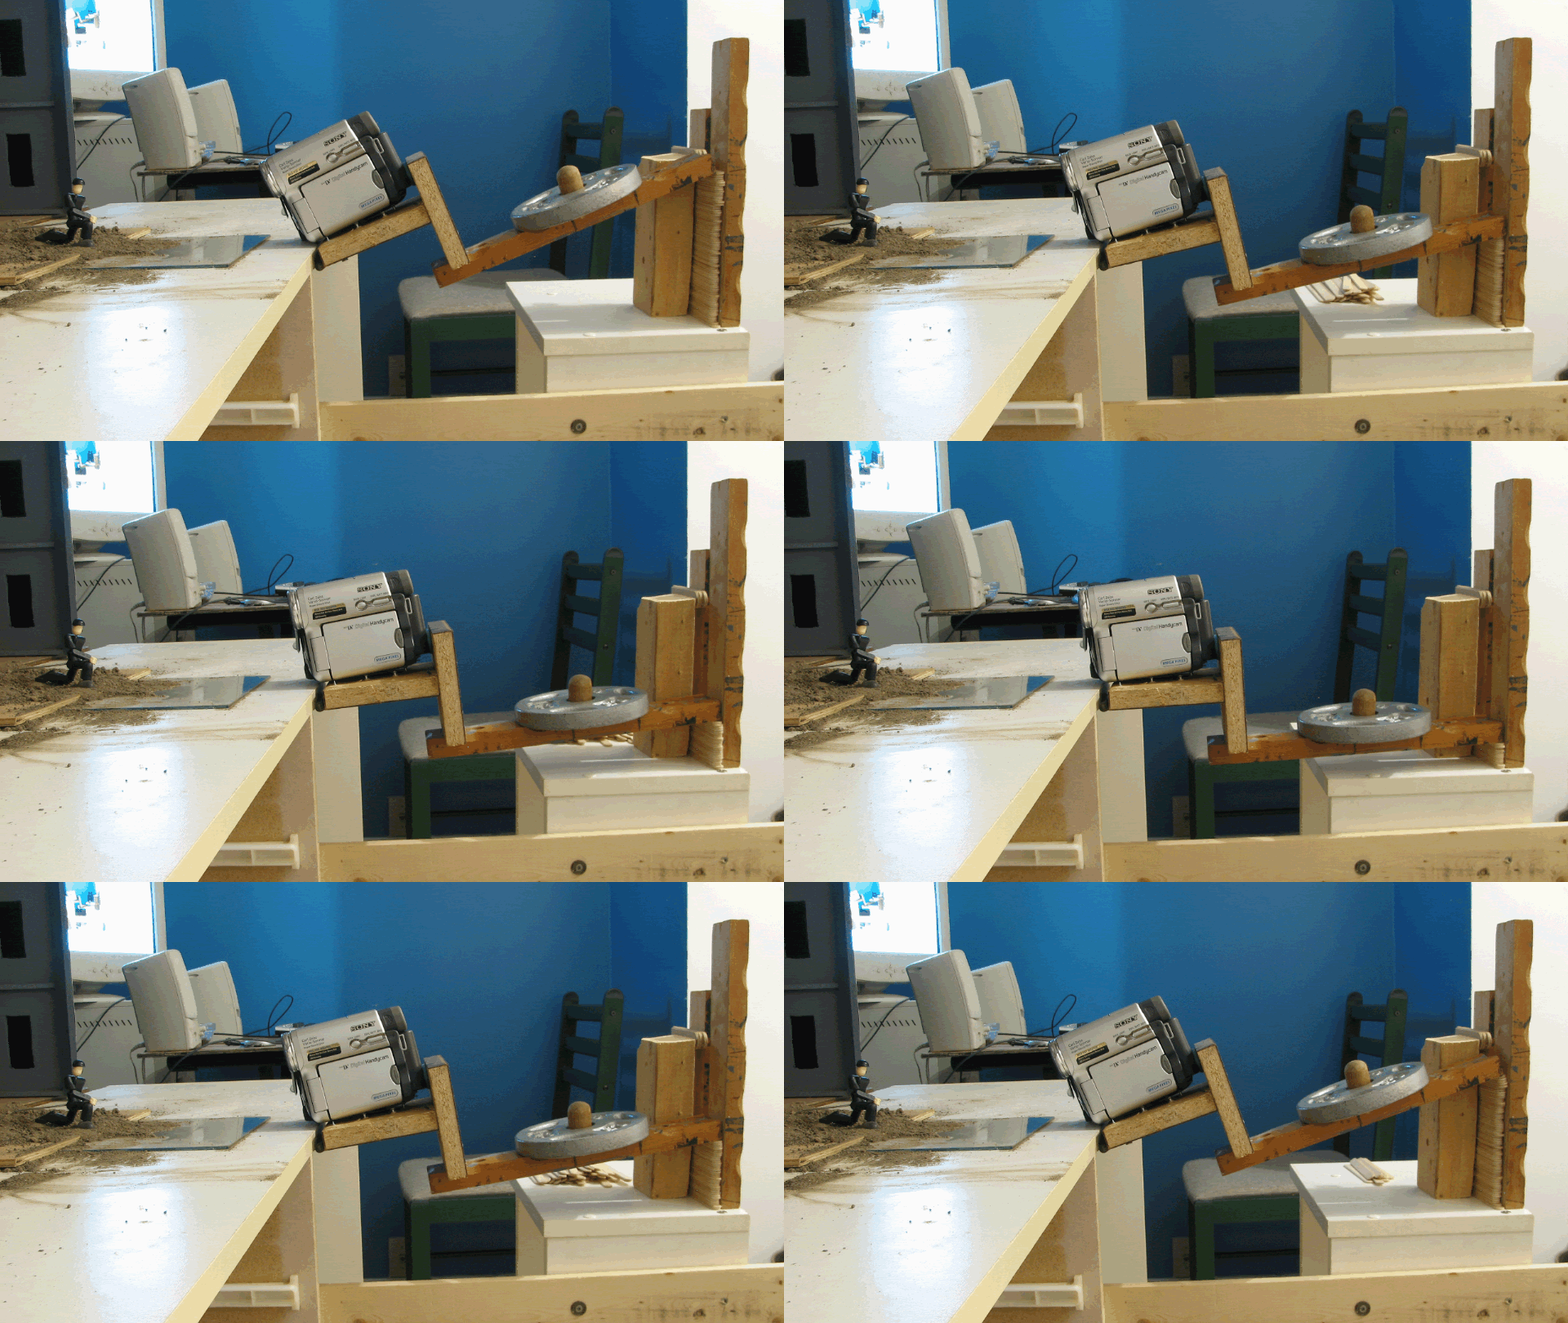
For the camera rig, i built pretty much the same mecanism as i did for "The city" sequence.  A hinge was screwed to maintain the rig.


To maintain the camera in place, i had used an old support.  The five screws in it are to maintain the tripod adapter that is under the camera.  Note that the screws are half way in the wood.


Popsicles sticks were used as measurement marks.  One Popsicle stick per frame (72).


A 2.5 lbs dumbell weight is there to maintain a constant pressure on the popsicles sticks.


Here's what it looks like in motion

Photobucket

(Note:  For the shot, i had to put my video camera on the rig in order to take these pictures with the camera that stands on it normally.  It's just there so you can figure out how this works)


Some pictures with the real camera on the rig


A normal mirror was used to simulate the water.


For the water ripple effect, i was lucky enought to borrow a computer for the week-end with Adobe After Effect on it.  I didn't really worked with that software before.  It's very powerful, but you get lost very easily.  Without this tutorial (done by Cirus), there was no way i could have make it.

Finally, for the character's animation, i had to pin it down in order that it doesn't moves everytimes i had to touch it.  I put through a wooden board, two nails for each legs and a steady wire that goes... in the butt.


I drilled two holes in his right foot, one in his left leg and another one in his left foot.


Here's the last hole drilled for the steady wire.


It didn't need to had glue for that.  The holes were tights enough so the nails and the wire stayed in place.


A little bit of soil and the wire disapear. (Yeah ! No wire removal required on this shot)


As the right arm doesn't need to move on that shot, i glued it on the right leg with crazy glue.  It can be seen on that picture.  I thought that it would become transparent, but it turned white.  I had to add black color on it in the post-production.


I was ready to let this toy for dead after that shot since the joints were very tired.  I placed an order for a new black Stikfas before putting crazy glue on it by the way.  Here's a picture after the shot.  The plastic melted on both members.


Here's a final shot from the sequence