Tuesday, May 24, 2011

Sequence #15 - "Gunfire"

Inguinal hernia is fixed and a new sequence is done.  It's been 2 weeks by now, that they wide-opened me in order to patch the hernia that i had on the lower abs level.  Look at my nice staples !  =) 


I'm in remission in the moment and will be for a couple of weeks.  I can't sit for more than 30 minutes (it hurts), so even if i'm not going to work, i can't work a lot inside the house neither.  The problem is that i can't lift anything and i can't hold a standing or sitting position for a while.  Anyway, little by little, i managed to work a little on my project in the last days.  I shot sequence #15.  Nothing very difficult and quite very simple, but it was something that needed to be done. In fact, it's more like a bridge between two important sequences, because it's only 1.5 seconds long.  

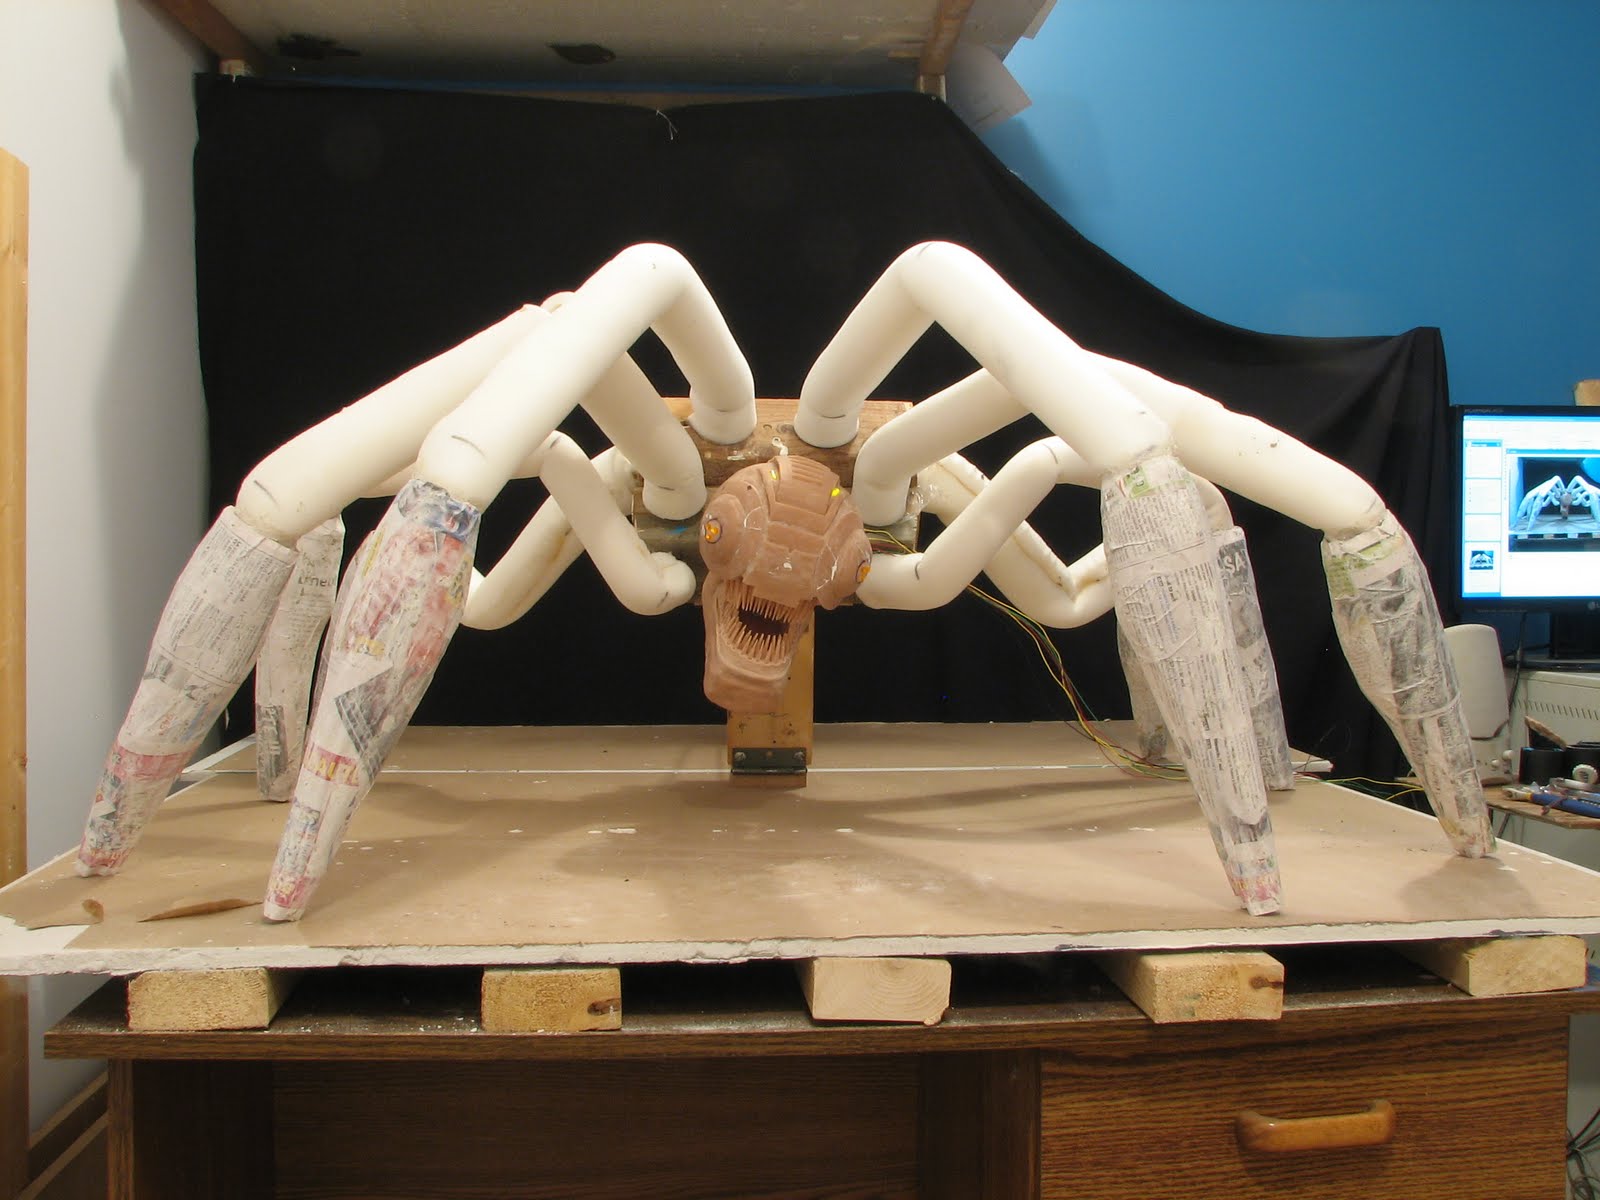
Here's what it look like.


The character's doing a quarter turn on himself and begin to shot, so i fixed him like i did on sequence #5 "Earthquake".


The lightning was a little tricky.  There's one light for the general ambiance and another one that simulate the gunfire.  The fire coming from the gun is done with photoshop, but the light it brings is real.


There's a LED light inside a pierced wood piece that act like a cannon.


There's 3 gunfire lightning setups.  On the bottom pictures, you can see :  Full light, half light and no light.  I just changed the setups with other wood pieces, i putted in front of the light beam.  Running these 3 lightning setups repeatedly in that order give a nice machine gun light effect on my character.


Sunday, May 8, 2011

Liquid latex applied.

This is it guys, no more ammonia smell in tha house !  Don't worried Shelley, i ventilated my basement appropriatetly =)  

Here's (below) some pictures i've took after applying a few coats of liquid latex on the legs.  I love how it came out.  You can almost smells the sweat of the Corsper.  I know, i shouldn't have selected so many pictures but, i deleted many of 'em and i couldn't erased more. 


As you may have noticed, the lightning play a big role when comes the time to shoot pictures.  In these pictures, the dark ones, i only has one light source (LED light).  When the time to animate will come, i'll have to add some more in order to lighten some dark areas.  On the pictures below, i roughtly recreate the final sequence of my video and you can clearly see that one light source isn't enough.

I need to say that one of my biggest worried is to recreate the lightning coming from the machine gun of the main character.  This is the primary light source to light-up the monster.  It goes white, orange and blue.  I bought some colored transluscent plastic sheet to put over the LED light bubble, for each frame that will be shooted.  I'll need to put that light between the two puppets.  I was planning to animate both all in once, but i'm considering rather shooting them seperately.  Some tests will have to be done.


I found 2.5 inches plastic plumbing tubing junction rings to join the legs to the torso at the hardware store.


I also bought 2 inches tubing that i saw at 45 degrees for the bottom legs junction.


I did holes to have access to the bolts.  I placed the holes out of the camera angles.  On the other side, there's a tiny hole, where a screwdriver's head can reach the screw.


I also want you to know that i got inspired by many people for doing the legs padding and the flesh.  Here are the two major puppet maker's video tutorials that helped me the most.


Nick Hilligoss


Website: http://www.picturetrail.com/hilligossnic


Richard Svensson


Blog: http://loneanimator.blogspot.com/2010/10/king-who-sought-immortality-building.html

Sunday, May 1, 2011

Papier mache time !

Ok, now my Corpser got it's claws !  (...at last.)


On my last post, i was saying that i would go with hard air drying clay to sculpt my claws, but after i finished two of 'em, i quickly realized that it would be a real pain in the neck to work with such heavy legs.  Fortunately, my friend Shelley Noble, helped me find out the perfect solution to do them:  "Papier mache".  She gave me the basic guidelines and nice tips to avoid problems (she's so sweet).  A couple of days after that, i randomly founded out the blog of an "papier mache expert" : Dan Reeder.  You should absolutely go take a peek at his work.  He has done nice instructional videos for beginners and looking at his masterpieces is so inspiring...  He is a really kind person who didn't hesitate to answer all my questions which helped me refine my understanding of the technique.  

Here's his links:
www.gourmetpapermache.com/  
papermacheblog.com/

I had tried two types of glue :  Elmer's art paste and a homemade one, made with water and flour.  Elmer's art paste worked well, but i got stiffer results with the water and flour recipe.  I just mixed up, 3 parts of cold water with 2 parts of white flour.


I've prepared the liquid latex covering phase by tightening-down the claws with the ties-down bolts.